Safety guidelines for climbers.
by Chris Naumann
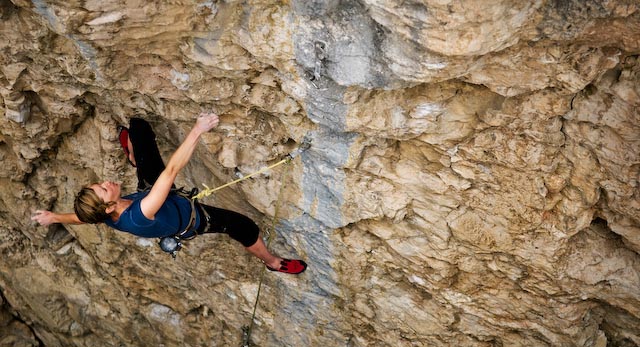
College students are known for being impulsive and thrifty, but sometimes—when rock climbing, for example—it pays to slow down and invest in your safety. Here are three simple things to think about: properly threading top anchors, doubling back your harness, and replacing old, worn-out gear. And, of course, don’t forget to wear a helmet.
Threading Top Anchors
Most climbing accidents occur at the top of a climb or during the descent. At the top of most sport-climbing routes in southwest Montana, you will find double-chain anchors (always consult a guidebook for specific anchor information). Once you’ve reached the anchors, clip in with a 24-inch sling girth-hitched to your belay loop, or two quick-draws for redundancy. Make sure that you clip into one of the bolt hangers or a chain-link other than the bottom ones, which you need to reserve for re-threading the rope.

After you’re securely clipped into and weighting the anchor, call for slack and take up about four or five feet of rope. Tie an overhand or figure-eight knot in the rope and clip this to your belay loop. This important step prevents you from accidentally dropping the rope after you untie your lead knot. (Dangling from the rock 50 feet up with no way down makes for an embarrassing call to Search & Rescue.)

Now you can untie your original lead knot and thread the rope end through the last two links of the anchor chains. Next, simply tie back into the end of the rope with the same knot you used for leading. Unclip and untie the knot securing the rope, and call to your belayer to take up the slack. Once you feel tension on the rope from your belayer, unclip the quick-draws and call to be lowered.

Doubling Back
Many climbing accidents occur because climbers fail to double-back through their harness buckles properly. Most buckles require the user to thread the waistbelt webbing completely through the buckle once and then back through again to lock the system. Always check your harness buckle—make it part of your tie-in routine. After tying in to the sharp end of the rope, take a second to assess the knot and confirm that your harness is doubled back. When belaying, always ask your partner if she is doubled back as part of your verbal routine.
When it’s time to replace your old harness, consider upgrading to a rig that utilizes a two-piece speed-locking buckle, which does not require the user to double back.
Replacing Old Gear
Though well-used gear may feel as comfortable as broken-in blue jeans, retiring hammered or old gear boils down to safety. There are two simple guidelines to follow. First, replace any piece of equipment that shows visible signs of damage: a crack in a helmet, frayed rope sheath, a grooved belay device. But most climbing gear will eventually need to be replaced even without explicit signs of wear. Which brings us to the second guideline: if you have any doubts about a piece of equipment, retire it.

Although buying new climbing gear stings the wallet, the cost is nothing compared to a visit to the emergency room.
This article first appeared in Outside Bozeman in the Summer of 2016. Chris Naumann is a lifelong climber and former owner of Barrel Mountaineering.