Category Archives: Activities

Summer Lovin’

by Leah Veress

Getting up and at ‘em in warmer weather. 

When the weather warms and the Bozone defrosts, odds are you’re itching to pull out your hiking boots, climbing gear, mountain bike, or fishing rod—but why not broaden your horizons, beat the crowds, and dive into some new, less mainstream outdoor activities this summer? Here are a few ideas to get you started.


Hunting & Gathering

Kill two birds with one stone, avoid the masses, and get in touch with your long-repressed primal side by finding your own food. If you’re interested in cutting your teeth as a hunter, don’t just twiddle your thumbs ’til big-game season comes around. Instead, learn how to hunt, clean, and cook wild game by pursuing smaller critters like squirrels and rabbits—species whose seasons are year-round. Head onto some public land—off-trail to avoid startling hikers—with a .22 rifle or 20-gauge shotgun and get to it. Come fall, you’ll be ready for the bigger fellers.

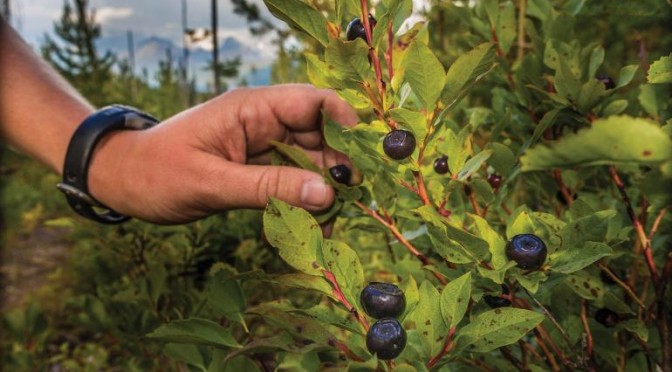
If the idea of harvesting an animal makes you queasy, fret not. The mountains of southwest Montana host an abundance of huckleberries, strawberries, raspberries, and edible mushrooms. Grab a basket and head to the highlands. We can’t give away our spots, but with some research and time spent in the backcountry, you’re sure to discover your own crop. Once you have your foraging skills dialed, you can begin pursuing fungi. Spring is morel season, and late summer brings a bountiful chanterelle crop. But be sure to bring an ID book or a knowledgeable buddy along—both species have poisonous lookalikes.


Slacklining

First pioneered by Yosemite’s rock-climbing community, slacklining has snowballed in popularity among various alcoves of the outdoor community. The practice—walking across a length of one- or two-inch nylon webbing suspended between two anchor points—claims a host of benefits, like improving balance and inducing meditative states. All you need to get started are two trees and a line. Start above soft ground in your back yard or a local park. Once you’ve got the hang of things, you can move to highlining or water-lining.

Bird watching in the Gllatin Valley


Wildlife Watching

Snag your binos, ID books (or download an app like Merlin or Seek), a snack, a good hat, and get ready to glass some wildlife. You can head into Yellowstone Park—a quick hour-and-a-half drive from the Bozone—or into any of the surrounding mountain ranges. Just be sure to respect private-property boundaries and give wildlife adequate space, lest you become a battering ram or dinner. If birding is more your speed, you’re in luck. With the Indreland Audubon Wetland Preserve right on the edge of town, you won’t have to travel far to spot your favorite feathery friends.

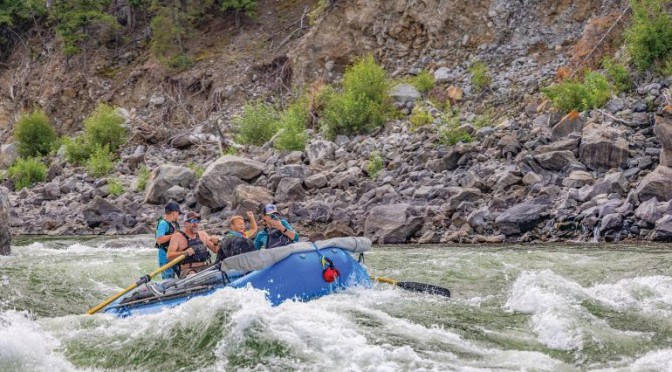
While still water is often cast as the ugly cousin of whitewater in southwest Montana, it shouldn’t be overlooked. If you’re looking for a relaxing day, load up your canoe, kayak, or paddleboard and hit the lake. Some good options are Hebgen, Quake, or Ennis lakes. Bring a lunch and get off the water to beat the afternoon winds, or put in early and end your paddle before they pick up. You can also cast a line from your craft and score some dinner if that’s your thing.


Cliff & Bridge Jumping

For the adrenaline junkies among us—and Tom Petty—few things beat that weightless, heart-in-your-throat feeling of free-falling. With spots like Williams Bridge by Three Forks and the ragged cliffs above the Ennis Lake dam, it isn’t hard to come across opportunities to catch some air and leap into the water. Always test the water’s depth before jumping—either by visually inspecting the area for obstacles, swimming to the bottom with goggles, or dropping a weighted object like a rock or anchor.

There’s really no wrong way to enjoy a Montana summer so long as you’re outside. So grab a buddy, a mentor, or go at it alone and meet some new friends on the water, in the field, or on a mountain.

Water World

by Carson Sprague

Chasing Montana’s whitewater.

Bozeman—and Montana as a whole—isn’t exactly known for whitewater, especially when compared to other states in the American West. The rivers of Montana are generally renowned for their fishing and floating opportunities instead of the roaring, high-volume rapids or secluded, multi-day stretches of river found in states like Colorado, Utah, Idaho, and Oregon.

There’s still plenty of fun to be had under the Big Sky. All you’ve got to know is where to look.

All said, we’re not much of a destination for seasoned boaters and paddlers hungry for carnage—but that’s their loss. There’s still plenty of fun to be had under the Big Sky. All you’ve got to know is where to look.


Where to Go

Yellowstone River
The Yellowstone is the only major river in the contiguous United States that is undammed in its entirety. The ‘Stone is free to flow however she pleases, which means that high water season can get pretty damn rowdy, though mid- to late summer is less exciting.

For more excitement, put in at Yankee Jim and take on its three major rapids—Boat Eater, Big Rock, and Box Car—and take out at Carbella campground.

The Gardiner town section is a fun stretch for intermediate boaters and oarsmen alike. Put in at Confluence Park and get ready for some action—the first waves are just 50 yards from where you launch, but things slow down quickly once you’ve passed the airport. If you’re looking to get multiple laps in—or have other plans later that day—consider taking out at McConnell fishing access area. Alternatively, you can enjoy the carefree float down to Cinnabar or Yankee Jim.

For more excitement, put in at Yankee Jim and take on its three major rapids—Boat Eater, Big Rock, and Box Car—and take out at Carbella campground. At median water (6,000-12,000 cfs), this float can be a challenging and exciting ordeal. But watch out when flows get over 15,000 cfs, as all three rapids can easily flip your boat.

Gallatin River
The Gallatin—or more affectionately, the Gally—is one of the premiere sections of whitewater in the Gallatin Valley, and the most easily accessible for folks living in Bozeman. It’s a great stretch, and there are plenty of access sites to choose from depending on what you’re looking for and how long you’d like your float to be.

Depending on water levels, the rapids can be anywhere from class II to class IV, including the infamous House Rock rapid.

For non-stop action that you can lap all day long, put in at the Lava Lake trailhead and take on the infamous Mad Mile. It’s a fast-paced, boulder-ridden ride that’s sure to satisfy even the most adrenaline-driven boaters. Depending on water levels, the rapids can be anywhere from class II to class IV, including the infamous House Rock rapid. Take out on river left at Lower Storm Castle, shuttle the rigs, and enjoy the whole 4-run ordeal all over again. If you’re looking for a longer float, consider putting in at Moose Flat or Greek Creek.

Madison River
The Madison’s claim to fame has always been its world-class fly fishing (not to mention the oft-mentioned bikini hatch in mid-July). While the lower sections of river belong to the leisure floaters, tubers, and driftboaters, the upper section—Bear Trap Canyon—belongs to whitewater fanatics.

Bear Trap is as exciting as it is scenic. Here you’ll find two bona fide class IV’s: Double Drop and the Kitchen Sink.

Starting just below the Ennis Dam at the Trail Creek day-use area, Bear Trap is one of—if not the—most exciting sections of water in southwest Montana. Tucked away in the solitude of the Lee Metcalf Wilderness, Bear Trap is as exciting as it is scenic. Here you’ll find two bona fide class IV’s: Double Drop and the Kitchen Sink. The latter can really be a doozy, so be sure to scout or portage on river right if you’re feeling trepidatious or unfamiliar with swimming technical whitewater. Take out on river left at Black’s Ford, or continue downriver to enjoy the bikini float.

Essential Gear
If you’re looking to get on the river this summer, the first thing you’re going to need to find is a suitable personal floatation device (PFD). It’s undoubtedly the most important piece of gear in any boater’s arsenal, and one that you shouldn’t skimp on. Be sure to find something comfortable, as you’ll be wearing it every day you’re on the water. Next, it’s time to look for a dry bag. A standard 10- or 20-liter roll-top bag will work fine for most day trips, as they can hold all the essentials—phone, keys, extra layers, and a first-aid kit.Montana rivers are pretty cold for nine months of the year, so if you’re hoping to partake in some early- or late-season boating, I’d strongly recommend you invest in cold-water gear, like a wetsuit or drysuit. Wetsuits are significantly cheaper, and easier to care for. Conversely, drysuits are significantly warmer—you can layer-up to your heart’s content —underneath—but they’re pricey, harder to maintain, and like Gore-Tex waders, can become drowning hazards should they fill with water during an unexpected plunge.

Montana rivers are pretty cold for nine months of the year, so if you’re hoping to partake in some early- or late-season boating, I’d strongly recommend you invest in cold-water gear, like a wetsuit or drysuit.

Lastly, if you’re looking to buy a boat but don’t know what’d best suit your needs, check out “Face-Off: Kayaking vs. Rafting” .

Etiquette
Boating etiquette is pretty straightforward and can be boiled down to one simple principle: don’t be a jackass. No one person owns the river. Be efficient at the boat ramp, and be courteous to others who are waiting to launch. Don’t crowd other folks when you’re on the water—they’re probably not interested in listening to your tunes or getting into an unannounced splash fight. Similarly, give anglers a wide berth, and don’t blow through their fishing holes and spook all the trout—unless you’re seeking a fistfight at the takeout.

Don’t crowd other folks when you’re on the water—they’re probably not interested in listening to your tunes or getting into an unannounced splash fight.

If it seems as though several boats are moving downriver as a group, let them be and don’t cut into their pod. If you’re a kayaker surfing a wave and see a boat approaching you, eddy out so they can maneuver through without worrying about running you over or comprising their line. Finally, don’t be a drunk. Nobody wants to deal with your shenanigans, and they didn’t sign up to be your personal rescue party if something goes awry.

The High Life

by Fischer Genau

Learning the ropes.

Climbers are able to scale some of the most treacherous terrain on Earth with only a rope, harness, partner, and a few hunks of metal. The Bozeman area sports a wide variety of such terrain, and there are ample opportunities for climbers to test their mettle. From burly boulders to bulletproof limestone cliffs, Bozemanites can find somewhere to go damn near year-round, despite the long winters. So, if you’re looking for your next big challenge, or you’re a newbie just getting her bearings, here’s a guide to get you started.

From burly boulders to bulletproof limestone cliffs, Bozemanites can find somewhere to go damn near year-round, despite the long winters

Essential Gear
Start with the basics. A pair of climbing shoes and a chalk bag will allow you to start bouldering and building your strength, turning the delicate skin on your fingers into callouses. The next step is a harness and helmet. Once you’ve got those, you can bum your brains out, tagging along with more experienced climbers who’ve got all the other goodies. It gets more expensive from there, but with each new purchase you’ll become less reliant on others (freedom ain’t cheap). Sport climbers will want to invest in a set of quickdraws, a rope (preferably 9.5-10mm for durability), a belay device, and some anchor-building items like cordalette, locking carabiners, and slings. Boulderers who want to take the next step just need a crash pad or two before they can strike out on their own, although it’s always best to bring a spotter. A traditional climbing rack is the epitome of autonomy, but buying one can really break the bank—a full rack of cams and stoppers will run you a cool grand. It helps to buy one piece at a time and collect your treasure chest over several months or even years.

A traditional climbing rack is the epitome of autonomy, but buying one can really break the bank—a full rack of cams and stoppers will run you a cool grand.

Uphill Pursuits and Spire Climbing Center both stock just about everything a climber could need, and Spire even sells consignment shoes and cheap chalk bags out of their lost & found. Second Wind Sports also often stocks used climbing shoes. Facebook Marketplace can be a good place to find certain pieces of discounted gear, but buyers beware: never buy a used rope, harness, cordalette, or quickdraws from a stranger, although carabiners, cams, stoppers, and climbing shoes are usually okay.

Where to Go

BEGINNER
You just bought a chalk bag and climbing shoes at the pawn shop. Your friend who convinced you to do so has inspected your wares—the shoes smell vaguely of mold, but look sturdy enough—and you’re ready to go. But where to begin?

Bear Canyon is only 30 minutes from town (20 in the car, 10 on the approach), and it contains over 40 bolted routes between 5.6 and 5.10. Plus, if you hit it in April immediately after the rock dries out, you can link it with a Bear Canyon ski lap for an easy multisport day.

For more variety, consider Allenspur, a 45-minute drive from town at the mouth of Paradise Valley. Allenspur has 80-some sport routes ranging from 5.7 to 5.12, and the views of the valley and the Yellowstone River are hard to beat.

Scorched Earth

INTERMEDIATE
You have your own rope, a set of 14 shiny quickdraws, and you just bought a Black Diamond Camalot C4, although you’re not entirely sure how to use it. Last weekend, you finally climbed Ignition (and took two whippers in the process), and you’re hungry for more… where to next?

On the south side of town, Practice Rock is a good place for anyone who wants to practice their trad climbing on a variety of mellow routes up this small gneiss crag just a few minutes up Hyalite Canyon. Climbers can also walk up Practice Rock’s backside to set a toprope on most routes, and it offers a smattering of sport climbs as well. 26 climbs in total from 5.6 to 5.12, including the classic touchpiece: Cardiac Arête, 5.12c.

If you head east from Bozeman on I-90 for 10 miles, you’ll reach Bozeman Pass, a collection of limestone crags containing over 50 routes, all sport, with a variety of 5.11 and 5.12 climbs to choose from. Don’t miss Black Russian, 5.11d, which boasts a combination of pockets, spiny dishes, and crimps on bulletproof rock.

Scorched Earth is another option, and although it only has about 15 routes, most of them are clean, intermediate sport climbs around 5.11. A half-hour south of Bozeman on Highway 191, the crag gets its name from the ample sunshine that blasts its south-facing walls, making it an excellent place to climb in the winter.


ADVANCED
You’re well on your way to becoming a trad king—at least that’s what you tell yourself in the mirror every night while flexing your wiry muscles—and you’ll clip into almost anything if it’s bolted. You keep a note of all the routes you want to climb before the snow comes, and you’re ready to start ticking them off the list… but you’re new to Bozeman and aren’t sure where to get the goods.

If you only climb in one area in Bozeman, it’s gotta be Gallatin Canyon. With over 400 separate climbs and counting, and a good mix of trad, sport, boulders, and even alpine routes, you could spend years there and still find surprises. Try Bowling for Buicks, a 5.12a sport route, or the iconic Sparerib, 5.8, a two-pitch trad climb that concludes with a set of double cracks running all the way to the top.

Outside the obvious, there are plenty of gems, some more hidden than others. Wolverine Bowl on the backside of the Bridger Mountains is more secluded than other crags around Bozeman—partly due to the 30-minute drive and hour-long approach—but it features some of the best limestone sport climbing in the area. If you go even further out of town, you can explore the Pipestone area’s practically limitless boulders, most of them undeveloped, or Natural Bridge’s profusion of steep, limestone sport routes, where new climbs go up every year.

Etiquette
It’s always important to be conscious of your impact on other people and the landscape, and climbing is no exception. Basically, just be respectful and remember that the world doesn’t revolve around you. If that sounds too complicated, here are some helpful pointers.

Don’t crowd on the crag. If someone else is on a route, pick a different one and patiently wait your turn instead of breathing down their necks—even if you’ve been waiting all week for a crack at it. Also, don’t hog a route once you’re on one. If it’s a popular climb in the area, chances are you’re not the only one who wants to have a go.

Don’t be a distraction. That means leave your dog at home if she’s going to bother other climbers (or other climbers’ dogs) and keep volume at a reasonable level by not spraying beta or playing loud music, unless you’re 100% certain that everyone else will enjoy listening to a 17-minute Grateful Dead song as much as you do.

Clean up after yourself. Pack out all your gear, check for trash when you leave, and, for the love of all things holy, dispose of excrement—yours or your dog’s—properly by digging a hole or packing it out

Tie One On

by Eli Fournier

Back to the basics.

No matter your occupation or preferred activities, there are a handful of knots that every Montana outdoorsperson should know—knots that are useful in all kinds of situations, whether paddling the rivers, camping in the mountains, or moving your mattress to the fifth rental house in two years. Learn the following four knots, and you’ll be all set.

Bowline knot

Bowline
The bowline might be the most versatile knot ever invented. It’s used to tie a loop on the free end of a rope. However, that loop can be strung around something while crafting the knot—say, a tree branch to tie off a boat, a food bag to construct a bear-hang, or a car frame to attach a tow rope. Thanks to the mechanics of the knot, the rope will break before it ever pulls lose. Yet to undo it, just “pop” the shoulder of the knot and pull it apart with ease.

Double figure-eight knot

Double Figure-Eight
The double figure-eight is a climber’s bread and butter. It’s used to connect the harness to the rope—a pretty dang important connection point. Fortunately, it’s simple to tie. Once you’ve made the initial loop and strung the rope through the harness, just be sure to retrace it exactly the same way. Have a friend check your work. Like the bowline, the double figure-eight can be used to create a temporary loop at the end of any rope or cord—but it’s more streamlined, so lends itself to attaching a carabiner, among a myriad of other applications.

Trucker’s hitch knot

Trucker’s Hitch
Even if you don’t have a truck, you’re gonna use the trucker’s hitch at some point to lash something to your vehicle—after all, you’re in Montana now. This dead-easy knot makes an adjustable loop (called a “hitch” in knot lingo), so it can be cinched down tight to secure a load. It’s commonly used to lash a canoe to the top of a car or tighten up the guy-out ropes of a tent.

Blood knot

Blood Knot
Aside from the clinch knot, the blood knot is the most common fly-fishing knot. It’s used to connect two pieces of tippet, or tippet and leader. But you ask: Doesn’t the double surgeon’s do that? Yes, but that knot is best when joining lines of similar diameter. A blood knot can easily connect lines of different sizes, making it far more versatile (not to mention stronger). It’s a streamlined, elegant knot that takes some practice to master, but you’ll never tie another surgeon’s again.

Talk the Talk

Learning the lingo of your new outdoor hobby.

Picking up a new activity is hard enough, and trying to figure out what your more advanced counterparts are talking about doesn’t make it any easier. With so much hyper-specific lingo—much of which is not intuitive—understanding what the hell your mentors are saying can be half the battle. Thankfully, we’ve compiled some of the most common jargon you’re likely to hear, from the river’s edge to the ridge and everywhere in between. So read on, and maybe someday you’ll be able to not just walk the walk, but talk the talk.

BIKING

Tacky / Hero Dirt / Brown Pow
Dirt that is mostly smooth, mostly rock-free, and has just enough moisture to hold your tires like glue. The ideal trail condition.

Clipless
Pedals that lock your shoes in place while you bike. Confusing, we know.

OTB (Over the Bars)
An unplanned dismount resulting from an abrupt change in speed which catapults you over your handlebars.

Technical
Steep, difficult trails with rocks, roots, and tight turns that demand precise movement and control. Often abbreviated by biker bros as simply “tech.”

Flow
Smooth, sculpted trails built for speed with berms, rollers, and jumps.

Rooster Tail
The spray of dirt or dust kicked up by your rear tire as you accelerate through a corner or berm. Cool kids truncate this metaphor to “roost.”

—Adam Brown

Elbow Lake Camping
CAMPING

Camp Spice
Flavor acquired by dirt and other natural objects getting into your camp food. “Don’t worry about it, dude. It’s just a bit of camp spice.”

Base Weight
The minimum cumulative weight of one’s packed backpack and gear without accounting for food & water.

Cowboy Camping
Sleeping out under the stars without a tent, tarp, or overhead structure.

Camel-Up
Drinking extra while at a water source to reduce the risk of possible dehydration later.

Freestanding
A tent whose structure relies on tent poles included with the tent

Non-Freestanding
A tent whose structure relies on other objects—such as trekking poles or sticks—not included with the tent.

Dirty Dinner
The first meal one consumes after returning from a trip to the backcountry; typically a gut-buster.

—Megan Gorsky

CLIMBING

Beta Spraying
Sharing the sequence of moves, tips, or tricks for a climb without being prompted to. An impressively annoying faux pas.

Protection
Gear—including cams, nuts, and quickdraws—climbers place to catch falls. Often shortened to just “pro.”

Runout
A long stretch between pieces of protection. Falling here comes with consequences.

Yarding
Grabbing the rope, gear, or quickdraws to haul yourself upward instead of climbing clean.

Pumped
When your forearms fill with lactic acid from exertion and your grip strength plummets—often the consequence of squeezing holds harder than necessary.

Flapper
A flap of skin forcibly removed from your fingertip or palm by the rock face.

Bail biner
The sacrificial carabiner you leave behind when you can’t finish a climb.

—Fischer Genau

Fishing rock creek
FISHING

Honey Hole / Honey Bucket
A particularly productive section of water that reliably holds good-sized fish.

High- or Low-Holed
When another angler cuts in close and begins fishing the water you were working toward; high-holed for upstream and low-holed for downstream. Widely considered one of the worst offenses in fishing etiquette.

Hog, Pig, Toad, Lunker, Slab
A fish that’s notably larger than average for the species.

Skunked
A day fishing with nothing to show for it. Often accompanied by excuses about weather, water levels, etc.

LDR (Long-Distance Release)
When a hooked fish throws the hook or comes unbuttoned before being brought to hand. Sometimes celebrated as “intentional catch-and-release from afar.”

—Adam Brown

Emigrant Peak
HIKING

Type 1 Fun
An excursion that is fun while you’re doing it.

Type 2 Fun
An excursion that stinks, but is fun to reminisce on afterwards.

Bonk
To hit the physical wall from over-exertion or lack of calories.

Cairn
A small stack of rocks delineating the trail. Don’t build new ones; it mars the landscape and can mislead future hikers.

Trail Magic
Unexpected acts of kindness, generosity, or good fortune on the trail; i.e., just as you were about to give up and turn around, a stranger appears, providing snacks, encouragement, and guidance.

Hiker Funk
The potent, unmistakable odor that clings to hikers after a long outing. A combination of sweat, sunscreen, moldy socks, and body odor.

—Adam Brown

Kayak touring Montana
PADDLING

Eddy
Pools of still water near the banks of a river caused by the current backfilling negative space behind rocks or other obstructions into the river.

Tongue
The smooth, fast water in the middle of a wave—the best place to be. Everybody loves a tongue ride.

Rig to Flip
To rig your gear in such a way that it remains secure even if you flip. Often used in conjunction with “Let’s get rowdy.”

Bootie Beer
A punishment for kayakers who were unable to roll their boat and are subsequently made to drink a beer from their river shoe—a.k.a. bootie.

Maytagged
The generally horrifying experience of being recirculated underwater, akin to being stuck in a washing machine’s spin cycle.

—Carson Sprague

Ice Climbing Hyalite
ICE CLIMBING

Ice Tools
Curved axes designed for climbing ice. Different than mountaineering axes, which are made for climbing snow.

Frontpoints
The often-serrated tips of your crampons that grip the ice as you kick.

Screamin’ Barfies
The painful sensation of blood rushing back into the fingers after climbing a cold, strenuous pitch—often accompanied by dry-heaving or vomiting.

V-Thread
A type of anchor built by drilling two intersecting holes in the ice with ice screws, which a rope can be threaded through.

Dinner Plates
Scary, delaminating ice that typically forms on convex bulges or where ice is intermixed with snow.

Hero Ice
Perfect, sticky blue ice that is easy to swing into and holds your tools solidly. This is what it’s all about!

—Jack Taylor

Crosscut nordic clinic singletrack skiing
NORDIC SKIING

Cross-Country
A blanket term encompassing general touring, skate skiing, and metal-edge touring. Also known as Nordic skiing.

Classic Technique
A traditional cross-country skiing style where opposite arm and leg move together. Also known as kick & glide or diagonal stride.

Scales
The fish-scale-like pattern on the bottom of a traditional cross-country ski, providing traction for the kick portion of the aforementioned kick & glide.

Skate Skiing
A technique where the skier keeps the tips of the skis apart and pushes off side-to-side, mimicking ice skating.

Groomed Trail
Trails smoothed and maintained by machines, often found at Nordic ski resorts but also on public trails and golf courses.

Basket
A plastic disk near the end of a ski pole that prevents it from sinking into snow, allowing the skier to push off.

—Leah Veress

Skiing Bode Miller
SKIING

Après Ski
French for “after ski,” though a more realistic translation would be “after party.”

Tomahawk
A crash that sends you ass-over-teakettle over and over, as though you were a spinning tomahawk.

Bluebird
When the sun is shining, the sky is clear, and the visibility is unlimited. It’s bluebird, baby.

Yard Sale
A wreck that scatters your gear across the slope, making it appear as though you’re having an impromptu yard sale.

Face Shot
When the powder’s so deep that your turns kick snow up into your face. An unbeatable, inimitable feeling.

Jerry/Gaper
An unexperienced, novice skier who’s generally oblivious to the codes of the mountain. Named for the unmistakable gap between the brim of the helmet and the top of the goggles.

—Carson Sprague

Powder Fever

By Carson Sprague

Diving into the Bozone’s most popular winter activity.

If you asked 100 Bozemanites what their favorite winter activity is, the lion’s share would say skiing—downhill skiing, that is. Bozeman is a skier’s dream through & through, and with two world-class ski resorts within an hour from downtown, along with an abundance of backcountry terrain in every direction, it’s easy to see why. Regardless of whether you’re a soon-to-be shredder or already an alpine aficionado simply looking for some beta, you’ve come to the right place. So let’s dig into everything you need to know about skiing and riding in southwest Montana.

Bozeman is a skier’s dream through & through, and with two world-class ski resorts within an hour from downtown, along with an abundance of backcountry terrain in every direction, it’s easy to see why.

Where to Go
With winter already knocking on our doors, it’s easy to feel the first signs of powder fever setting in. You may begin pacing around your room, drooling over ski maps, and feverously watching ski & snowboard movies to quench your thirst. But there’s only one thing that can scratch that itch, and that’s rippin’ down the face of a snow-covered mountain. Thankfully, there are plenty of viable options.

Situated only 17 miles from downtown Bozeman on the east side of the Bridger Range is Bridger Bowl—the long time favorite for generations of southwest Montana skiers and boarders. Besides the obvious convenience (can’t beat a 25-minute drive to the mountain), Bridger’s claim to fame comes from its incredibly diverse terrain. There’s something for everyone: easy, beginner runs with moderate slopes; long, cruisy intermediate sections; steep moguls, gullies, trees, and traverses for more advanced skiers; and the ultimate side-country experience of all: The Ridge—the top quarter of the mountain accessible only by poppin’ off your skis and hiking up. Yup, it’s got it all.

But there’s much more for skiers here to enjoy besides Bridger. Big Sky—located roughly 50 miles south of Bozeman—is home to some of the greatest terrain in the country (and the record for most-skiable acres at one resort). Here you’ll find long runs, fast chairlifts, and one of the best terrain parks in the nation. But it all comes at a cost, and their prices are even steeper than the routes off the famed Lone Peak (a lift ticket will run you upwards of $250 a day).

Beyond Gallatin Valley, there are plenty of other ski areas worthy of note. Check out Discovery outside of Anaconda, Red Lodge Mountain southwest of Billings, Maverick Mountain near Dillon, and Showdown up by White Sulphur Springs. Out of state options like Jackson Hole and Grand Targhee can also make for a great weekend getaway, with both being roughly four hours away.

Backcountry
While chairlifts do have their perks, nothing beats getting fresh tracks away from the powder-hungry masses. If you’re looking for solitude—and a way to get your heart pumping—backcountry skiing is a great option. But remember that the risks of the backcountry can rival the reward. Always go with an experienced partner, and don’t be afraid to turn back if the conditions look menacing. For information on the conditions and weather, check out the Gallatin National Forest Avalanche Center’s (GNFAC) website.

Early in the season, ski areas like Bridger Bowl are great for honing your skills and getting your legs under you—just make sure to get out there before they start spinning chairs. You’ll need some extra gear—and possibly another set of skis—but we’ll get to that later. For information on local tours, check out the trails page.

Essential Gear
Unfortunately, skiing ain’t cheap, and if you want to partake in Bozeman’s favorite winter pastime, you’re going to have to cough up some dough. But that doesn’t mean you need to drain your savings account to hit the slopes. In early November each year, the Bridger Ski Foundation (BSF) hosts the Ski Swap—a community market for buying and selling used winter gear. There, you’ll find everything you could possibly need at a fair price, and 30% of every sale benefits BSF.

Skiing ain’t cheap, and if you want to partake in Bozeman’s favorite winter pastime, you’re going to have to cough up some dough.

It’s best to start building your set-up from the bottom up. First find a good, comfortable pair of boots. Boots are not only the most important piece of equipment in a skier’s arsenal, they’re also the most overlooked. During my time as a ski instructor, I encountered countless beginners with brand new skis and crappy, hand-me-down boots—needless to say, most of ‘em didn’t stick with it. There’s no substitute for comfort, and no two feet are the same. Don’t just buy something online because your buddy said to. Always try on a pair of boots before you buy ‘em, and be sure the fit is snug but not cramped.

Now it’s time to find a pair of skis. Beginners should start something in the 90-105mm underfoot range that reaches between the tip and bridge of your nose. When buying used skis, inspect the bases and edges for signs of excess wear and damage, but don’t fret over a couple dings or scrapes—those can easily be repaired by a ski shop. Most used skis will come with bindings, but if not, speak with a salesperson at a local ski shop and follow his or her recommendation. Once you’ve secured these big-ticket items, you can start looking for the cheaper, lower-priority gear like poles, goggles, and a helmet.

If you’re hoping to get into the backcountry, look for a pair of boots with “walk mode,” as they will make your tours significantly more enjoyable. You’ll also need a pair of lightweight AT bindings, or at the very least some frame bindings. Finally, you’ll need a pair of skins. Be sure to buy skins that are as wide as the widest point of your skis—not just your underfoot.

Backcountry skiers also need specific avalanche safety & rescue gear—beacon, shovel, probe, and backpack. If you don’t know how to operate your gear, consider taking an avalanche safety course through GNFAC (mtavalanche.com).

Etiquette
Unless you want to become persona non grata on the slopes, there are some things you ought to keep in mind. While some rules are meant to be broken, others—like those featured here—are there for a reason. First, it’s important to remember the mountain doesn’t belong to you, and everyone is up there to have a good time. Be courteous and thoughtful of others and practice the Golden Rule. On busy days with long lift lines, don’t be afraid to share a chair with strangers. Don’t ski in roped-off areas, and don’t be reckless in a way that endangers others. Always look where you’re going. Just because you’re okay with taking a high speed crash doesn’t mean that the grandma you barrelled into was.

Always look where you’re going. Just because you’re okay with taking a high speed crash doesn’t mean that the grandma you barrelled into was.

In the backcountry, remember that the skin track is sacred—don’t muck it up with boot tracks, and certainly don’t relieve yourself (or worse, let your dog relieve himself) in it. Respect the abilities of everyone in your group, and don’t take folks into terrain they can’t handle. Finally, take your speaker out of your damn backpack and buy a pair of earbuds—just because you think you have good taste in music, doesn’t mean everyone else wants to hear it.

Snow Limits

by Carson Sprague

Discovering new ways to get after it in winter.

Winter in southwest Montana is a wonderful time of year, and there’s no limit to the ways you can spend it. While more fashionable cold-weather pursuits have made Bozeman a mecca for winter recreators, there’s more to do than just skiing or ice-climbing. So, if you’re looking for a way to enjoy the splendors of winter sans skis or ice axes—or are simply seeking to break up the monotony—look no further.

While more fashionable cold-weather pursuits have made Bozeman a mecca for winter recreators, there’s more to do than just skiing or ice-climbing.

Snowmobiling
The thrill of opening the throttle on an 850cc snowmobile and tearing up a field of fresh powder is hard to beat, and there’re plenty of places to ride across Montana—the Bridger Range, Paradise Valley, Cooke City, Big Sky, and West Yellowstone, to name a few. Plus, there’s no shortage of ways to utilize a snowmobile, or “sled,” such as accessing hard-to-reach backcountry terrain, cruising snowed-in trails and access roads, or simply going out for a rip. Sleds aren’t cheap, but thankfully there are plenty of guide services and rental shops around Gallatin Valley that can hook you up with a ride, helmet, and ski suit.

Ice Skating
There are few activities that lend themselves to romanticism, artistry, and brutality like ice skating does—and all you need to go is a pair of skates and a bit of humility. Bozeman maintains several outdoor community rinks come mid-December—Bogert, Southside, and Beall—all of which are free to the public. Several elementary schools in the area put up rinks as well, although they’re only open to the public after school’s out. Looking for professionally maintained ice? Head on over to Haynes Pavillion. Entry is only $10, and another $5 if you need rentals. Once you’ve got your legs under you, you can take things up a notch with a race around the rink or a friendly game of stick-and-puck hockey.

Ice Fishing
Though not exceptionally popular in the West—and sometimes looked down on by more serious (read: pompous) anglers—ice fishing is a great way to spend a day during the winter. All you need is an ice auger, a rod, a chair, some warm clothes, and a beverage of your choosing. Waterbodies such as Hyalite Reservoir, Canyon Ferry, Glen Canyon Pond, or the Bozeman Pond are all great options, but always check that the ice is at least four inches thick, lest you find yourself taking an unexpected (and potentially fatal) polar plunge.

Snowshoeing
Hiking in the wintertime can be great—no mosquitoes, no bears, no people—but post-holing through deep snow is an exhausting and miserable experience. Avoid the hassle by finding yourself a pair of snowshoes. While they’re relatively inexpensive (a beginner set up is typically about $200), you can also rent a pair through MSU’s Outdoor Recreation Program or at various outdoor shops. Once you’ve gotten your hands on shoes (and poles—they help a ton), all you’ve got to do is bundle up and take to the hills. Snowshoes work best in deep snow, so don’t be afraid to get off the beaten path and blaze your own trail.

Sledding
It doesn’t get better, or more nostalgic, than barreling down a snow-covered hill on a piece of plastic with the expectation—nay, intention—of crashing. The beauty of sledding lies both in its simplicity and accessibility, as it requires no skill, no fancy gear, and no level of physical aptitude beyond walking uphill. Anywhere with a suitable incline will do, and there’s plenty of fun to be had in-town at Peets Hill, the Snowfill Recreation Area, the Regional Park, and Langohr Campground up in Hyalite.

Ice, Ice Baby

The guide to an ice-climber’s paradise.

by Jack Taylor

Bozeman has some of the best ice climbing in the Lower 48, from easy top-rope crags in Hyalite to grueling alpine routes in the Beartooths. Many folks arrive in this town having never even considered ascending a frozen waterfall using sharp metal spikes, only to find themselves fully hooked on the sport just a few years later. Once considered the realm of extreme alpinists, ice climbing is now an avocation for the masses. Clinics are offered all winter by various guide services, so you can safely learn the ropes. And in case you haven’t already heard about it, the annual Bozeman Ice Festival is not to be missed.

Where to Go
Beginner
Though Hyalite has a good selection of easy climbs, as a starting place, one crag is more popular than all the rest: G1 (formally Genesis I). It’s the closest cliff to the Grotto Falls parking area—just a 15-minute walk up the hill—and you can easily set up a top-rope by scrambling around to the right. Once you’ve mastered the movement here, check out nearby Lower GreensleevesFat Chance, and Mummy I.

Intermediate
A logical progression, the next step up is G2, about twice as far up the hill as G1. It’s longer, more difficult, and more exposed, but you can still hike around (left, this time) to set up a top-rope if you’re not yet ready for lead-climbing. Other excellent intermediate climbs in Hyalite include HangoverThe Fat OneMummy II, and Twin Falls.

Advanced
Hyalite has hundreds of ice and mixed climbs, and if you’re looking for a comprehensive guide, check out Joe Josephson’s guidebook The House of Hyalite. The Unnamed Wall has dozens of moderate to difficult single-pitch routes. Dribbles, considered by many as the best climb in Hyalite, tackles three long pitches of pure ice. Cleopatra’s Needle is a breathtaking, difficult line near Twin Falls that’s sure to draw a crowd.

Outside of Hyalite, notable climbs include Hydromonster near Cooke City, California Iceup East Rosebud Creek, and the Lowe Route on the Sphinx—a popular early-season route with a burly approach that becomes dangerous once the snowpack builds up.

iceclimbing-teddybanker3_lr
.

Dress the Part
It can be awfully cold scaling a frozen waterfall, and proper layering is essential. Start at skin-level: thick wool socks to prevent cold feet and bruised toes, and synthetic or wool long underwear on the top and bottom. Next, don a fleece sweater that you’ll be comfortable in all day, and perhaps fleece pants if it’s cold out. At this point, start piling on upper layers (too many lower layers will restrict movement in your legs). A synthetic insulated jacket will keep you toasty. Throw on a waterproof shell and rain pants to keep dripping water on the outside—even if it’s below freezing, ice climbs can still be wet. Carry two or three pairs of gloves, at least one of them waterproof, and a hat or balaclava that fits under your helmet. For really cold days, bring a big down parka, but be sure to only wear it when you’re belaying. If you wear it on a climb, it’s sure to get wet from sweat or dribbles, which will render those down feathers cold, heavy, and possibly damaged.

Make sure to bring enough food and water—your body burns a lot of calories when it’s cold. Some nice extra touches include a thermos of hot soup, tea, or cocoa; a package of handwarmers; and perhaps a nip of whiskey if you’re feeling frisky. Most importantly, take safety seriously: carrying a satellite-communication device is always a good idea, and if you’re going into avalanche terrain, carry a beacon, shovel, and probe. Always let somebody know where you’re going, and when you expect to be back.